Please check out the following FAQs (Frequently Asked Question) in order to find the quickest solution to the issues you may encounter with REP.
If you still have questions, please contact us at support@simcoders.com providing the log.txt file created by X-Plane.
Installation & Update
Yes, REP already works with X-Plane 12 as long as you update REP to v4.7.0 at least, following instructions below.
Do not copy the plane folder from XP11 to XP12 but rather make a clean installation of the plane AND REP following these steps:
- Install and unlock the plane
- Install but do not unlock REP
- Update REP to beta using the Skunkcrafts Updater
- Unlock REP by going to the plugins menu -> Simcoders REP -> Enable Package
REP beta is being updated every few days in order to improve the planes flight dynamics in XP12 based on the new flight model. Here’s the current update status list and known bugs.
Planes that already got the improved flight dynamics
- Default Laminar Cessna 172SP (1)
- Default Laminar Baron B58 (1)
- JRollon + SimCoders SIAI-Marchetti SF.260 (1)
- Carenado Piper PA-31 Navajo (1)
- Carenado Baron B58 (v1.x)(1)
- Carenado C210 for XP11 (v1.x)(1)
- Carenado F33A for XP11 (v1.x)(1)
- Thranda Kodiak
- Thranda Beaver
- JustFlight DR400
- JustFlight PA28 Arrow III
- JustFlight PA28 Turbo Arrow
Planes that won’t be updated as they do not work in XP12 due to errors in the plane
- Carenado V35B for XP10 (v3.2)
- Carenado C210 for XP10 (v3.2)
- Carenado F33A for XP10 (v3.2)
- Carenado PC12 for XP11 (v1.3) (Note: it may be updated in the future as it seems a SASL update is sufficient to make it work. In this case REP will start working with it)
(1) Features the modern XP12 rain effects
Generally speaking, no. We’ll do our best to le you use your current REP with XP12.
More information about this matter here: https://www.simcoders.com/faqs/will-rep-support-x-plane-12/
Here’s a short video tutorial that works for any REP you want to install.
The following instructions use the Cessna 172SP folder as the target for the REP package. This is just an example and the very same procedure will work for any other REP plane.
e>
- Locate the Cessna 172SP folder inside your X-Plane installation.
- Clone the Cessna 172SP folder. Call the clone such “Cessna 172SP REP“.
- Extract the contents of the REP package into a temporary folder
- Take the contents of “into-aircraft-plugins-folder” and put them into the “plugins” folder of the “Cessna 172SP REP” folder
- Take the contents of “into-aircraft-main-folder” and put them into the “Cessna 172SP REP” folder
- Run X-Plane and load the Cessna 172SP. If you cannot find the Cessna 172SP REP among all the C172 in your aircrafts list, hover with the mouse on each of the C172 in the list, a popup with the folder name will appear.
- Follow the onscreen instructions
The expected folder structure is the following:
If you’re having issues with your Carenado C210 or Piper 31 Navajo in X-Plane 12, it is likely due to compatibility problems with the SASL license system used by Carenado. These planes cannot be unlocked if installed from scratch on X-Plane 12, preventing them from being ready for use with the Reality Expansion Pack (REP).
The Issue
The SASL licensing system embedded in these aircraft is not fully compatible with X-Plane 12. As a result:
- The planes remain locked and non-functional if installed directly into X-Plane 12.
- This incompatibility prevents further installation of the Reality Expansion Pack.
The Solution
To resolve this issue, follow these steps:
Install on X-Plane 11:
- Install your Carenado C210 or Piper 31 Navajo in X-Plane 11.
- Enter the license information to unlock the aircraft.
Copy to X-Plane 12:
- After successfully unlocking the aircraft in X-Plane 11, locate the aircraft’s folder in your X-Plane 11 Aircraft directory.
- Copy the entire aircraft folder to the appropriate Aircraft folder in X-Plane 12.
Install the Reality Expansion Pack (REP):
With the aircraft now unlocked in X-Plane 12, proceed with installing the REP as per its installation instructions.
Additional Notes for Mac Users
If you are using a Mac with an M1 or M2 processor, it is necessary to use Rosetta to ensure the Carenado SASL licensing system works correctly. To enable Rosetta:
- Right-click the X-Plane 12 application in Finder and select Get Info.
- Check the box labeled Open using Rosetta.
- Launch X-Plane 12 and proceed with the above steps.
This process ensures compatibility and allows you to enjoy your Carenado aircraft fully in X-Plane 12 with the Reality Expansion Pack.
REP requires the FreeType library to render fonts and graphics correctly. If FreeType is not installed or not detected on your Mac, REP will fail to load properly.
FreeType is an open-source software library used to render text in graphics and applications. It is a critical dependency for many programs, including REP.
To install FreeType on your Mac, follow these simple steps:
- Install Homebrew (if not already installed):
Homebrew is a package manager for macOS that simplifies the installation of software like FreeType.- Open the Terminal (search for “Terminal” in Spotlight or find it in the Applications > Utilities folder).
- Run the following command to install Homebrew:
/bin/bash -c "$(curl -fsSL https://raw.githubusercontent.com/Homebrew/install/HEAD/install.sh)"
- Install FreeType using Homebrew:
- After Homebrew is installed, run this command in the Terminal:
brew install freetype
- After Homebrew is installed, run this command in the Terminal:
- Verify FreeType Installation:
- Once FreeType is installed, verify its presence by typing:
freetype-config --version - You should see the version number of the FreeType library displayed.
- Once FreeType is installed, verify its presence by typing:
- Restart REP or Your System (if needed):
- Close and reopen REP to ensure it detects the newly installed FreeType library.
- If issues persist, restart your computer.
To automatically update your REP packages using the SkunkCrafts Updater, follow the instructions below depending on the aircraft you are using.
If you are using REP on a third-party aircraft
(for example, a default or add-on aircraft that you upgraded with REP)
-
Install the SkunkCrafts Updater application by following its official user manual.
-
Open the REP zip file you downloaded from the store.
-
Copy both
skunkcrafts_updater.cfgandskunkcrafts_updater_beta.cfg. -
Paste these files into the main folder of the aircraft you installed REP on (the aircraft root folder, not the REP folder).
-
Make sure X-Plane is not running when you launch the Skunkcraft Updater.
⚠️ Important: This step is mandatory for third-party aircraft. If the files are not copied into the aircraft main folder, the updater will not work.
If you are using an aircraft sold with REP already included
(for example, the SIAI-Marchetti SF.260 by JRollon or the Bonanza by PAE Addons)
-
Install the SkunkCrafts Updater application by following its official user manual.
-
You do not need to copy any configuration files. The
skunkcrafts_updater.cfgandskunkcrafts_updater_beta.cfgfiles are already included and correctly installed in the aircraft package. - Make sure X-Plane is not running when you launch the Skunkcraft Updater.
X-Plane 10 users
The latest versions of the SkunkCrafts Updater do not work with X-Plane 10.
To use the updater on XP10, download the compatible version from this link:
https://e.pcloud.link/publink/show?code=XZAlNdZ4y0calFjs1mcCiHsiRG2BLSlljk0
When a plane used as a base-model for REP already provides a skunkcrafts_updater.cfg, it’s safe to overwrite that cfg with REP’s.
The skunkcrafts_updater.cfg that comes with REP will provide both the REP updates and the base-model updates.
When the base-model produce is about to ship an update, we test it and – if needed – we update REP. Then we ship both the updates (base-model and REP) on our beta channel for a while, to be sure that everything is OK and then the update hits the stable channel. This is all seamless to the end user.
If you’re sure you’re typing the licence correctly, this problem could be related to an installation error.
On version 2.2 or newer
Please follow this procedure:
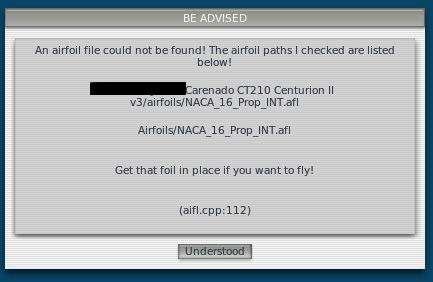
- Remove the plane’s folder from X-Plane
- Install the original aircraft folder (for instance, the one provided by Carenado)
- Extract the rep files in a temporary folder
- Copy the “REP” folder from the package to the “plugins” folder of the aircraft (do not copy it inside the main “plugins” folder of X-Plane)
- Run X-Plane
- Follow the onscreen instructions
Note:
When installing REP, make sure that inside the “plugins” folder of the aircraft, together with the plugin folders from Carenado there is another folder called “REP”. Inside it, you should find the “32”, the “64” and the “data” folders.
On version 2.1 or older
Please follow this procedure:
- Remove the plane’s folder from X-Plane
- Install the original aircraft folder (for instance, the one provided by Carenado)
- Extract the rep files in a temporary folder
- This is the important part: copy the files from the “airfoils” and “plugins” folders contained int the temporary REP folder, and paste them into the “airfoils” and “plugins” folder of the aircraft. Do not replace the folders “as-is” or their original content is deleted. If you’re using a Mac, you can get more info about merging two folders here: http://www.howtogeek.com/198043/how-to-merge-folders-on-mac-os-x-without-losing-all-your-files-seriously/
- Copy the other REP folders/files into the aircraft folder
- Run X-Plane
Note:
When installing REP, make sure that inside the “plugins” folder of the aircraft, together with the plugin folders from Carenado there is another folder called “REP”. Inside it, you should find the “32” and “64” folders.
Also, in the main folder of the aircraft you should have another folder called “REP” in which you should find the installation.cfg and configuration.cfg files.
This problem may happen after an update if your previous REP installation was somewhat corrupted. This may happen especially if you are updating from v2.2.0 to v2.2.1.
To solve this problem, remove the folder of your REP airplane from X-Plane’s “aircrafts” folder and reinstall both the airplane and REP from scratch.
For example, you see the pilots while in cockpit view, the switches are not clickable or you get this error message:
This is related to a corrupted installation. To fix this please follow the procedure stated in the following FAQ: http://www.simcoders.com/faqs/i-get-the-invalid-product-licence-error/
The crash is most likely caused by SASL.
Some users reported SASL-related crashes on Windows 10 as well on El Capitan (see this post by Ben Supnik).
To fix the problem you must update SASL to a newer version:
- Download SASL from here: http://www.1-sim.com
- Extract the zip files
- Copy the “sasl” folder to the “plugins” folder of the REP aircraft you want to update. Overwrite the existing “sasl” folder.
- Run X-Plane and enjoy REP!
The beta channel is supported since REP v4.0.3.
- Inside the REP zip file downloaded from the store, you find a set of skunkcrafts_updater.cfg and skunkcrafts_updater_beta.cfg files.
- Copy the cfg files into the main folder of your REP aircraft.
- Double click the aircraft in the SkunkCrafts Updater to access the Aircraft Channel and check the Enable beta channel box.
For users on Catalina, they will need to manually approve the XPL.
Please follow the instructions stated here: https://forums.x-plane.org/index.php?/forums/topic/193236-macxpl-cannot-be-loaded-because-the-developer-cannot-be-verified/&do=findComment&comment=1774578
If still the plugin is not loaded, follow the instructions shown in this post: https://forums.x-plane.org/index.php?/forums/topic/194055-mac-os-x-catalina-and-macxpl-files/&do=findComment&comment=1935328
You can find more general information about this problem here: https://forums.x-plane.org/index.php?/forums/topic/192252-mac-os-catalina-1015-xpl-problems/
In this case the airplane you repped must be removed from the UI airplanes.
Please do as follows:
- Open Aircraft menu
- Click on the “AI Aircraft” button on the top-right corner of the “Aircraft” pane
- Remove any C172/Beech Baron from the list
- Be sure that the “Random Aircraft” option is not checked
Another, more complex solution is to create a separated C172 (or B58) used for AI only from which you removed the FMOD folder. To do so, please follow these steps (the same steps are valid for the B58):
- Make a copy of the default C172SP and call it “Cessna 172SP AI”
- Remove the fmod folder from the Cessna 172SP AI
- Open PlaneMaker and load the Cessna 172SP AI
- Go to Standard -> Author and uncheck “Supports User Flight”
- Save the changes
- Now, still using PlaneMaker, load the default C172SP
- Go to Standard -> Author and uncheck “Supports AI Flight”
- Save the changes
- Now, still using PlaneMaker, load REP’s C172SP
- Go to Standard -> Author and uncheck “Supports AI Flight”
- Save the changes
- Clone PlaneMaker and run X-Plane
At this point, X-Plane will load a C172SP that was made for AI and that has no FMOD sounds in it, preventing the crash.
This happens when installing REP over a B58 that does not match the expected folder structure or files contents.
To solve the problem:
- Make sure you’re using the B58 V3.2
- Install REP again over a mint B58 folder
This is usually caused by an incorrect installation.
Be sure to:
- Remove the aircraft folder from X-Plane “Aircrafts” folder
- Reinstall the aircraft either using the original zip from the store (if Carenado) or X-Plane installer (if default Laminar aircraft)
- Install REP as per manual instructions, making a copy of the original aircraft folder
Install the proper libraries
To run REP, you need to install the required dependencies.
To do so, run the following command in the terminal.
sudo apt-get install libcurl4 libcurl4-openssl-dev libssl-dev libcrypto++-dev
Extra step if you’re using X-Plane from Steam
Running X-Plane from Steam, some libraries may be out of date.
Do the following to create the proper symlink to the right library:
cd /home/$USER/.steam/ubuntu12_32/steam-runtime/pinned_libs_64

mv libcurl.so.4 libcurl.so.4.bak

ln -s /usr/lib/x86_64-linux-gnu/libcurl.so.4 libcurl.so.4
General
The Reality Expansion Pack menu can be vertically moved along the left side of the screen by setting a custom vertical offset.
To do so, in REP’s settings menu, change the value of the “Lateral menu vertical offset” option.
To use the imperial units, click over “Plugins”, then “SimCoders – REP”, then “Settings”.
There, check the “Use imperial units” option.
Razer Cortex Booster
This problem could be caused by using Booster software like Razer Cortex Booster that closes explorer.exe.
If explorer.exe is closed, X-Plane may behave in unknown ways. In this case, it will not provide the mouse events to REP, which, in turn, is unable to detect when the user clicks on the side menu bar.
X-Plane Bug XPD-9176
Another cause of this issue could be using X-Plane on a secondary monitor. On some systems, X-Plane does not forward the mouse and keyboard events to plugins’ windows when they are placed on a secondary monitor. We worked with Laminar in order to solve the problem but they were not able to reproduce it correctly on their system, therefore the bug was never fixed. It was filed as XPD-9176.
To solve the problem, make sure you’re running X-Plane on the monitor set as Main Monitor is Windows’ settings.
Make sure that you installed REP inside the “plugins” folder of the aircraft and NOT inside the main plugins folder of X-Plane.
Also, you should put the plane’s folder inside the “Aircrafts” folder of X-Plane in order to make it working properly.
This happens when the 3D model is loaded before the plugins.
It is an issue that is related to a specific hardware/software configuration and often arisen after an X-Plane update.
Some users reported that it can be solved by:
- Open Regedit
- Disabled all the keys related to X-Plane 11
- Restart the PC
Laminar Research stated that X-Plane doesn’t use any Regedit key, but it seems that on some occasions some X-Plane add-ons do. This could cause some interferences or incompatibilities.
The Experimental Flight Model (EFM) is currently supported in the following airplanes:
- ASDG Piper Super Cub
- Thranda Kodiak
- Thranda Beaver
- JustFlight Piper Arrow III
- JustFlight Piper Turbo Arrow III/IV
- Cessna 172
- Robin DR400
All the other REPs will show a warning message if the EFM is enabled.
Since X-Plane 11.50, it is possible for a developer to always “force” the EFM on for his airplane regardless of the user’s choice in X-Plane settings. SimCoders, as well as other third-party devs, is following this path. The EFM is now forced in XP11.50 for all REPs that support it and it cannot be disabled.
This may happen if your graphics adapter drivers are out of date.
Ensure you’re using the latest available drivers for your graphics card.
This problem is not directly related to REP but rather it’s an internal X-Plane crash caused by a number of factors.
The solution comes in two forms.
- Load a default airplane and connect to FSE, then load the REP airplane you like and do your flight
- If present, remove the “Scroll wheel” folder in the plugins folder of the aircraft
Yes!
All REP windows are now fully visible in Virtual Reality (VR).
Starting with version 3.4.0, REP introduces experimental support for VR headsets, allowing windows to be seamlessly viewed in VR.
With the simcoders/rep/vr/open_menu_command, you can open a dedicated VR-compatible menu. This menu provides access to key features such as the Kneeboard, Tech Report, Walkaround, and more.
Additionally, REP includes a variety of VR-compatible commands. These can be configured in the Settings → Keyboard section of X-Plane, enabling you to control all REP features using your VR controllers effortlessly.
Yes, REP for the Cessna 172 SP is compatible with both the analog and G1000 version of the aircraft.
In REP v4.3 we updated the C172SP P-Factor to match the updated real-world data we got.
The real C172 requires quite a lot of right rudder even during level flight.
To see more about the data, check out this post: https://forums.x-plane.org/index.php?/forums/topic/190929-realism-in-rep172/&do=findComment&comment=1754219
This is usually caused by incorrect installation or by using an incompatible mod done to your aircraft.
Be sure to:
- Remove both the REP aircraft and the original aircraft folders from X-Plane “Aircrafts” folder
- Reinstall the aircraft either using the original zip from the store (if Carenado) or X-Plane installer (if default Laminar aircraft)
- Install REP as per manual instructions, making a copy of the original aircraft folder
To see which version of REP you’re running, click over “Plugins”, then “SimCoders.com – REP” and then “About”.
REP works on Windows, Mac and Linux in both 32 and 64 bit variants.
The speed reported by the tables is the True Air Speed while the airspeed indicator reports the Indicated Air Speed.
To shed some light on this, we published a post about it.
The performance tables can be found in the kneeboard.
To open it just move the mouse to the right-side border of the screen or go to “Plugins”->”SimCoders – REP”->”Kneeboard”.
You can disable the failures from the plugin settings menu. In this way you can fly without worrying about the operational limitations but still take advantage of the REP flight dynamics and other features.
Please write to support@simcoders.com providing as much informations as you can about your support request.
Our company is based in Europe. If you’re living in the Americas or in Asia it could take up to 24 hours to receive a reply from us.
Engine
This is because the two times are calculated in different ways.
The analog cockpit version reports the proper oil temperature (the one calculated by REP). The G1000 version, instead, can only report the default internal oil temperature of X-Plane, which is totally useless in REP’s case.
This is a known issue. Even tho REP totally overrides the default engine, X-Plane does not allow it to write some datarefs such the oil temperature and pressure. This means that in the analog version REP replaces the indicator which then shows the right value. In the G1000 there’s no way to trick the value shown to the user so the instrumentation reports the default oil temperature, even tho it has no operational value. The default oil temperature, in fact, is totally useless as the engine in use is not the default one.
EDIT: updates on this matter here
This usually happens in XP11 if you have a Warthog HOTAS connected to your PC.
To solve this issue:
- Open the joystick options in XP11
- Select the Warthog HOTAS
- Make sure that the fuel pump switch is not assigned to none of the buttons
This is caused by the Warthog HOTAS. See this FAQ to solve the problem.
The Red Box is a set of potentially harmful power/mixture regimes. You can, therefore, extend your engine life if you stay away from the Red Box as long as possible.
The power settings given by the performance tables will put you right inside the red box. In fact, engine manufacturers wrote down those tables when the today knowledge about internal combustion engine was not available. Then, the introduction of modern engine monitors showed that the power settings given by manufacturers are – sometimes – the worst.
When you get an in-flight tip about the Red Box, enrich or lean the mixture until it goes away.
Insights about the Red Box and mixture leaning
If you’re interested to know more about the Red Box, please read this article (scroll down to “The Dangerous Red Box” paragraph): Where should I run my engine?
If you want to learn more about correctly leaning the mixture and stay away from the Red Box, please read this article on our blog: How To: Lean the Mixture
The Reality Expansion Pack simulates the failures of a real engine.
For example, you should not overboost the manifold pressure or run the engine over a certaing amount of power for too much time.
Do not run the engine at high RPMs when the CHT is too low.
You must always refer to the engine limitations reported in REP’s manual.
For the Cessna 210 the major limitation you get is 36 InHg of manifold pressure and 2700 RPM for a maximum of 5 minutes.
To fix this proble, assign to the mixture control the “mixture1” axis instead of the generic “mixture” axis used by default. If you’re already using the “mixture1” axis, switch back to the “mixture” axis.
To assign a joystick axis:
- Run X-Plane
- click “settings”, then “joystick & equipment”
- A window opens. There you can change the axis assignments of you joystick.
If you’re using CH Control Manager, make sure that its settings are correct for X-Plane. Some users have reported that uninstalling and reinstalling the latest version of CH Manager solved the issues.
The T210 comes with an automatic turbo wastegate. It means that when you set the throttle to specific MAP value, that value is kept constant by the turbo system.
You won’t need to adjust the throttle while climbing, descending or changin the RPMs.
You can see the automatic wastegate at work if you abruptly change the RPMs. Changing the RPMs will make the MAP rise/decrease for a while then it settles back where it was.
A side effect is in the fuel flows. When you decrease the RPMs you will see the fuel flows decreasing as well and vice versa.
It all depends on the CHT. If it’s more than 70-100 °C you easily incurr in a vapor lock. That’s how the TSIO-520 behaves.
Just run the fuel pump for at least 30 seconds. This will recirculate the fuel in the fuel lines with two effects:
- Convert fuel vapors into actual liquid fuel
- Cool down the fuel lines for a while
Keep in mind that the engine manufacturer usually provides the power output/fuel flow tables with an average of the 10% of accuracy. This means that a 10% of error is still admitted.
That said, always check the performance tables for the specific EGT you should set to get the proper readings (for example, many tables report the fuel flow at peak EGT). This means that you must lean the mixture properly.
Just set full throttle and close the mixture then engage the starter.
As soon as you see that the prop is accelerating, set full mixture and reduce the throttle.
Other Systems
If you use hardware toe-brakes you need to disable both the following options in REP’s settings:
- Automatic Differential Brakes
- Smooth Brakes
This has been reported to be a SAM plugin bug. The SAM author is working to fix it.
Beechcraft provides an oxygen system for their B58s as an optional feature.
The oxygen handle is always fitted in the cockpit but the oxygen pressure indicator is provided only if an oxygen system is present.
In the model simulated by Carenado there isn’t an oxygen pressure indicator, therefore that B58 is not equipped with an oxygen system.
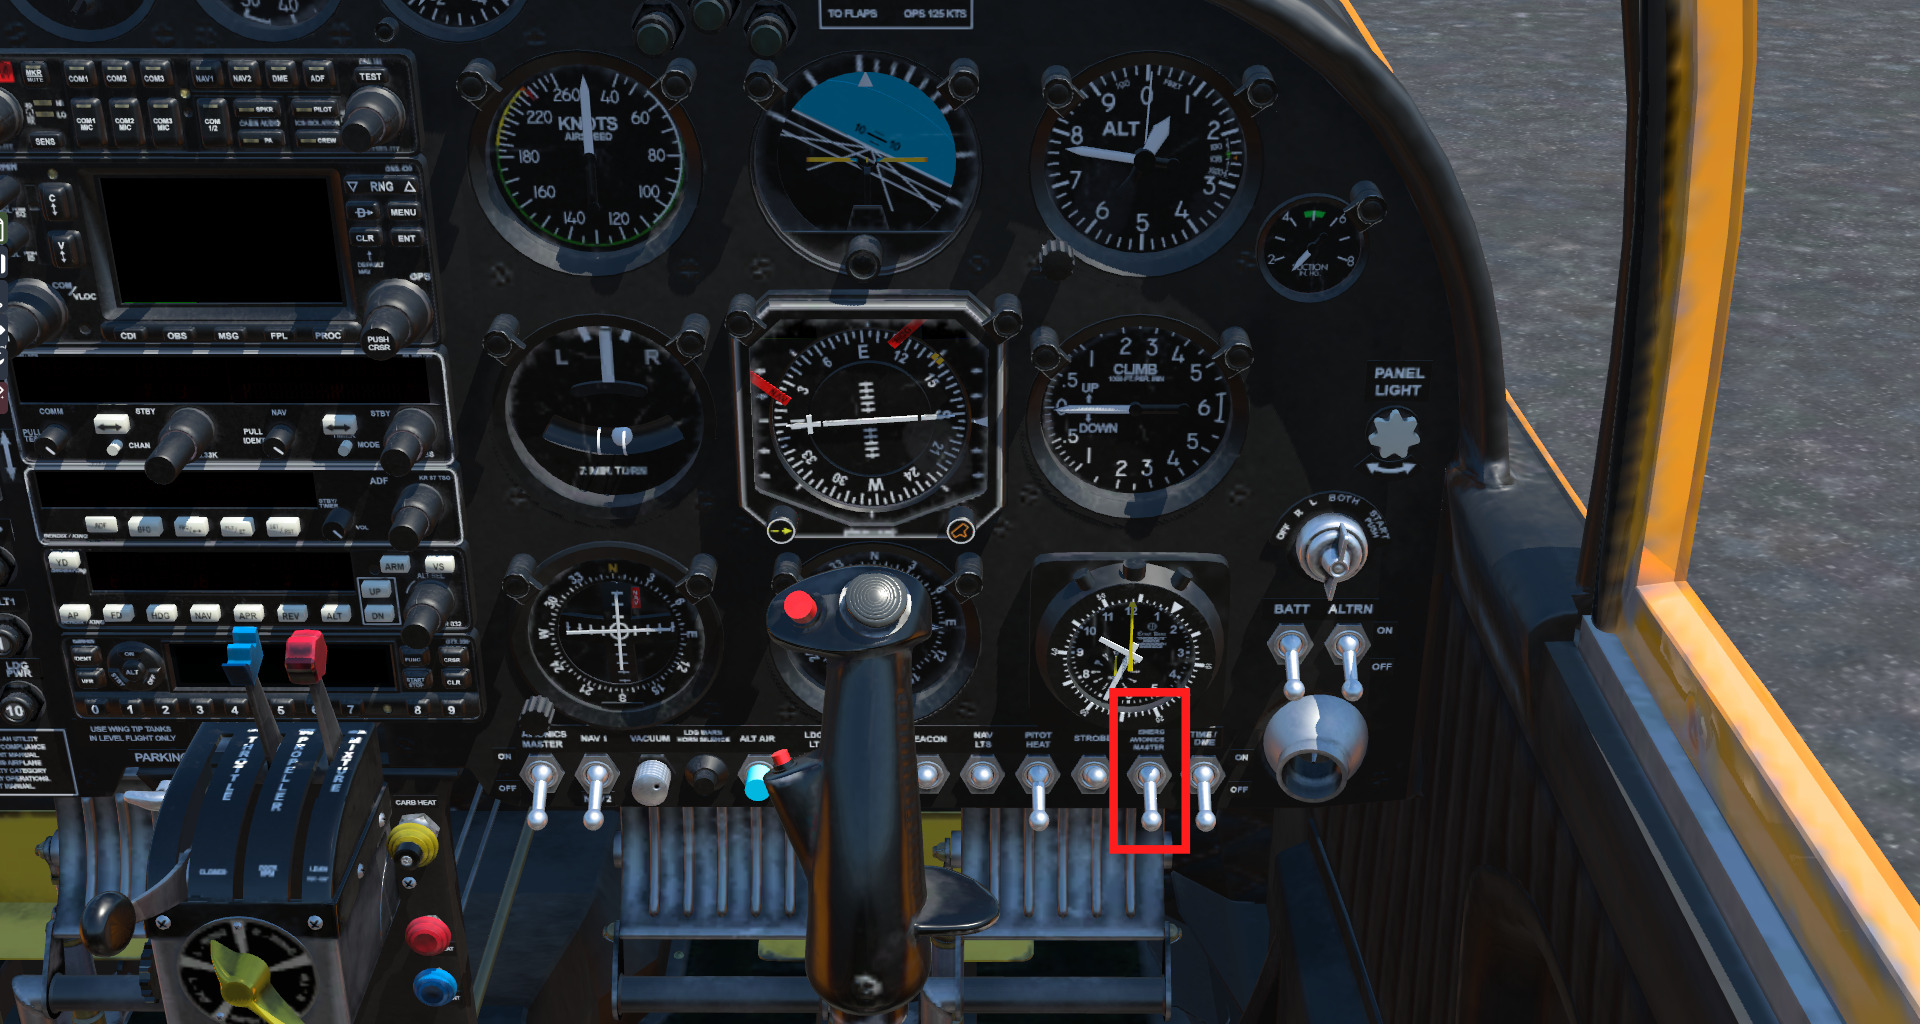
Check that the Emergency Avionics switch is set to OFF.
To know more about the Emergency Avionics, read the “Electrical System & Avionics” chapter of the user manual.
Checkout this video tutorial from Javier Rollon.
Make sure that the Panel Lights are set properly.
You find the panel lights switch in the lower section of the main panel.

Check that you turned the alternator switch on.
Software-related issue
If the nosewheel tiller is active in X-Plane, the toe brakes cannot provide steering.
Make sure the nosewheel tiller command is not active when using REP.
Hardware-related issue
If you change your hardware, X-Plane does not reset the hardware preferences by itself.
If you used to assign the toe brake axis to an older joystick/rudder pedals that you do not own anymore, you may find that REP is not able to recognize the correct toe brake axis in use.
Moreover, after an X-Plane update, the hardware data may cease to be provided to the plugins such REP.
To solve this problem follow this procedure:
- Remove the preferences files of X-Plane (especially “X-Plane Calibration.prf”) from the Output/preferences folder.
- Run X-Plane. It will reload the hardware.
- Set the joystick axis assignments as you like
In case this should not work, you can disable the Advanced Nosewheel Steering feature from the REP’s settings window.
The flaps sounds should be audibile only when the engine is not running. This is actually a feature.
To get more informations about how to operate the flaps without hearing them, please read this post: http://www.simcoders.com/2015/10/18/all-you-want-to-know-about-reps-flaps-implementation/
The Cessna 210 and the Cessna 172 feature a spring loaded front steering wheel.
This means that you are not directly controlling the nose wheel steering using the rudder pedals but rather you must turn using the toe brakes.
To allow the front wheel to steer correctly, you should first let the aircraft move towards ahead and then, only when it’s moving, you start turning by moving the rudders and applying differential braking.
If you turn on the master switch and nothing happens, it could be that the battery is completely discharged. To recharge it, open the Hangar Window, click on the Electrical System tab and then click on the “Recharge” button in the battery section.
The performance tables contained in the kneeboard were written by the aircraft manufacturer basing on data recorded on a full loaded airplane with a specific Center of Gravity (C.G.) position.
This means that if you are flying with a different plane load or with a aft/forward C.G. the resulting speed may differ a little (few knots) from the one reported in the tables.